Font Style, Font Size, and Font Colors: To change a font or font color on your site or blog is a fairly simple task. One thing to always remember about html is the importance of the bracket. Brackets are important because the open and close a code. If you do not add these then your code is useless and it will most likely show up as regular text on a page or not show up at all.
Font Style:
When changing your font style one important thing to remember is the importance of using standardized fonts (i.e. fonts that come as defaults on most computers. Examples of these are times new roman, georgia, etc.) This is important because you need the actual font file on your computer for it to recognize the font on the screen. If the font is not loaded on the computer then the computer will pick from one of the default fonts and use that in its place. This can ruin your layout because all fonts function differently in their spacing and height. A way around this problem is to ask the user to download the font but this also has problems because some users may not know how or they may not care to. You can always save what you want in the font you want as a graphic element, that way it is always consistent throughout your blog or your layout. But if you want to change it, here is the code you will need.
Note that were "Georgia" is, you can put in any font style of your choice.
Another important issue when thinking about your font style is whether or not you want to emphasize what you want to say through the use of bold, italics, or by underlining your words. There are several ways to achieve what you want.
MAKE IT BOLD:
There are two ways to make a font bold. One is the "strong" command and the other is simply the letter "b" Below I have provided the proper codes you will need to make your font bold.
Italicize Me:
There are two ways to make a font italicized. One is the "em" command and the other is simply the letter "i" Below I have provided the proper codes you will need to make your font italicized.
Underlined Importance:
To underline your text simply use letter "u" in brackets. Below I have provided the proper codes you will need to make your font underlined.
Font Colors:
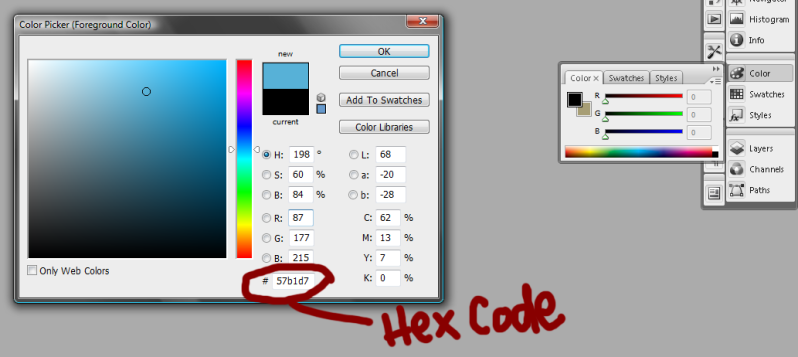
Font colors can really add to the look of your site, especially when the compliment the over all theme of your layout. There are two ways to looking at font colors. One is by using the name of a color (i.e. "Red", "Green", and "Blue") and the other is by using hex codes. The draw back of the first technique is that you are not able to pick the exact shade of red, blue, or green you like. All you get by using that technique is a cheesy shade of default color that may or may not look go with the look you are trying to achieve. Hex codes, however, let you achieve the precise color, shade, and hue that you want in a font color. What exactly are hex codes? Hex codes are a mixture of letters and numbers that are specific to shades of color. There are sites that provide you with hex codes but a simple way of getting a hex code is by opening your graphics program (i.e. Photoshop), then double click on the color palette. Use the eye dropper to get the shade you want and copy and paste the hex code from the bottom of the menu to the proper html. This seems like a lot but I have provided an image as an example because I'm pretty sure I suck at explaining things.

I will now try to change my font color using both methods. The code for both is below.
Ex: This Uses the first code and this Uses the second code.
Font Size:
There are several different ways to change your font size. One is by calculating size through pixels, percentage, or word values (i.e. "small", "x-small", etc.) My favorite method is using the pixels measurement. A font that is 1 pixel is size is small and a font 15 pixels in size is big.
Ex: It's Big, No? and Small, yes?.
Combining Color, Style, and Size:
As you might have guessed you can simply your html code by combining the style of the font and the color of the font in one single code. There are two ways to do this. One is through html, and the other through css or Cascading Style Sheets. The beauty of css, especially for a website is that you can code the whole layout onto one css file and just change that file to make changes to your layout, versus, having to change every page to suit your needs. I will show you both ways.
HTML
Ex: Text Goes Here
CSS
"body" classifies for the whole body of the page. "p" is the classification used with paragraphs. Please note that css is what you use for actual layouts. I do not recommend it for single pages on blogger. You can however, use to edit your layout.
body
{
font-size: 2px;
font-style: Verdana;
font-color: #591261;
}
or
p
{
font-size: 2px;
font-style: Verdana;
font-color: #591261;
}
or
{
font-size: 2px;
font-style: Verdana;
font-color: #591261;
}
|
Linking and Images: Here I will teach you how to code a text link and image link, along with coding images onto a site. You will also learn how to target a link and change the size of your image using html.
Linking Text:
When adding a link it is important to remember that when you click on a link, it usually opens up in the same window that you are using. This is can be both a good and a bad thing, depending on what you are trying to achieve. If you want your link to open in a new window or a new tab, you will have to target your link. Below I have given you the code to for a text link along with an example for targeting.
To target a link use the following:
Ex. of regular link, no targeting: Click me and Ex. of targeted link: Click me
Adding and Resizing an Image:
To add an image to a site the image must be hosted somewhere on the net. The host could be blogger, an outside source like photobucket, or even your own webdomain. You will also need to know the file name of your image along with the image extension, which tells the computer what type of file it is. (i.e. jpg, png, gif, etc.) Once you have uploaded your image and you know the following information then you can add the following code to your site.
Ex: I have copied and pasted the same code below for an example.

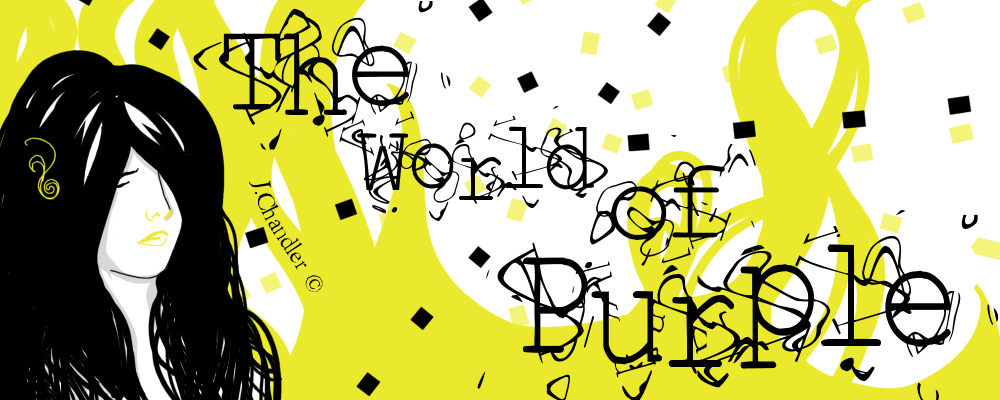
The image is quite large and if I wanted it to be smaller I could do one of two things. I could open up a graphics program like Photoshop and change the size there or I could change the how the size "looks" in html. To change the image size with html I will need to know the dimensions of the original image, otherwise, the image could look stretched or squished together. I check my image size by right clicking and looking in the properties menu or by opening the image up in a program like Photoshop and checking there. This particular image is 1000px wide by 400px high. I want to make it half the size so I'm going to shave 500 pixels from the width and 200 pixels from the height. I do this by adding the "width" and "height" code to my image source code.
Ex: I have copied and pasted the same code below for an example. See the difference in this image from the original image?

Combining Image and Link Knowledge Base:
Here is where we combine what we know about links and images. Below is a code for linking an image and targeting an image link.
Notice that I have added border="0" to the image source code. Since the image is now a link it holds certain link properties. Text links like fonts can have different colors, styles, and sizes. Image links take on certain characteristic of text links through borders. If you an image link has a border degree of 1 or 2, it will show a colored border around the image. This color is determined by the color set for your links. If you do not want a border around your image link, just set the border to "0".
Ex.(Not Targeted):

With targeting your code will look like this:
Ex. (Targeted Image Link):

| 